Tuesday, June 25, 2013

Parallel resistors, Part III, final post. I hope.


So, my little brother (if you recall, of the Bruce Lee level electrical/computer kung fu) indicated in his comment on a previous post that:

"Remember, you always have to put your multimeter in series with the CURRENT you want to measure and in parallel with the VOLTAGE you want to measure. If you try to measure the current by putting your meter in parallel with it, then you have just given current another path to flow and diverted it away from your main circuit (meaning you effectively have no idea how much current is flowing through the circuit in question)."

Of course, his use of the word "remember" implies that at some point in the past I learned the fact in question. 

The astute reader may also remember this quote of mine from the first post:

"This does allow for measurement of current but bypasses the switch and closes the circuit.  When I did so, I had a current of about 17-18 microAmps. When I pressed the switch, the current dropped to 0.1 microAmps. "

This made no sense to me at the time.  Things that don't make sense to me annoy me.  Make me stay up at night.  But remember, dear reader, the wisdom of Shakira:  "hips (and multimeters) don't lie".

When you measure current in parallel, you set up a situation as seen below:


In which the meter becomes a resistor in parallel with whatever is in between the two probes.   So it makes intuitive sense to me that the current of electricity--like the current of a river--follows the path of least resistance (but see link). So the ohmic (is that a word?) values of X and the meter dictate what the meter shows.  In the situation from the quote above, the measured current of "17-18 microAmps" was with the switch open, and all the current flowing through the meter (as is appropriate).  If plugged into the diagram above, x = infinity. Once the switch closed, however, then x = 0.4 ohms (measured), and then it all depends on the resistance of the meter as to where the current flows.

If the current drops by 2 orders of magnitude, then the resistance of the meter must be two orders of magnitude higher, or somewhere around 40 ohms.  We will see in a bit that we have some data that indicates it's lower than that, but that still means 90% of the current flows through the switch, not the meter.

So to demonstrate that,  I set up the following experiment:


This runs an LED through a protective resistor and then a potentiometer in series.  The resistor is designed to protect the LED even if the potentiometer is set at zero.  I then measure across the potentiometer and vary the resistance.  The above photo has the resistance of the potentiometer set to almost zero (it measures around 1.4 ohms).  The fact that we have very little current running through the meter indicates that the resistance of the meter is likely higher than that.


Now we have the same setup, but with the resistance of the potentiometer set as high as it will go, something like 45 kohms.  The current running through the multimeter has increased substantially.

Of note the LED did not change intensity at all.  Which indicates that this "sharing" back and forth is a zero sum game, as discussed previously.

Here, then, we have an inverse relationship.  Flow ~ 1/resistance.  What is the total flow through the circuit, then?


To answer that question I had to rewire things. This now bypasses the potentiometer entirely and goes through the switch, where I can put my multimeter in series like I should.  So the total flow is 10.88 milliAmps.

Which means that we now have a means of measuring the resistance of my multimeter on this setting.  If two resistors are equal, then flow through them should be equal. So if I can adjust the potentiometer to give me 5.44 milliAmps precisely, then it should be exactly the same resistance as the meter, and then we can measure the multimeter directly.

Turns out that's difficult to do.


The potentiometer is quite nonlinear in the range I need.  Much fiddling was done, over the course of two days, to try and get close to 5.44.  Best I got:


This was the second day, where the measured current across the switch was 10.72 milliAmps.  The measured resistance across the potentiometer at that point was:


Which although a little hard to read, is 15.1 ohms.  Dividing out the percent of current going through each resistor gives 58.39% of the current through the meter, and 41.6% through the potentiometer.  What resistance on the potentiometer will give us exactly 50% flow?  That should equal the resistance of the multimeter.

Can't use a straight ratio because this is an inverse relationship.  It's (1/15.1) x (1/41.6) = (1/50) x (1/x).  Solving for x gives 12.5 ohms.

Not sure if the math is valid but it gave me an answer that makes sense.  And much fun was had!

,m


Resistors in parallel, part 2

Again, I refer the reader to the HO:ME blog, which really should be read in parallel (pardon the pun) with this one.  As we learned last week, two blogs in parallel should reduce your resistance to learning...

Today a variation on the theme from last week, in that we will wire two resistors in parallel, that have different resistances.  We spent some time last week looking at a accidental case of this, in which we wired our "triangle circuit" 


And saw that the flow through the wire should be 10^5 higher through the wire than the resistor.  My little brother saw this and informed me that in a circuits class, this would be viewed as "shorting out" the resistor.  The wire would be assumed to have a resistance of zero and the triangle above would simply be erased.  I actually measured the resistance of the wire (0.4 ohms) and although I am not perfectly certain my multimeter is accurate down in those ranges, it's the data I got, so it's the data I'll use. 

So the setup of today involves a 1K and a 2.2 K resistor, like so:


I have drawn these out using Modified Deshazer Notation, which probably does not coincide with standard notation. 

So let's see what these look like.  Let's first demonstrate the baseline current for each resistor:


So if you can't read that, it's 0.74 mAmps through a 2.2 Kohm resistor on the left, and 1.61 mAmps through a 1Kohm resistor on the left. Baseline voltage is about 1.6. 


And then each one in parallel, just measuring off one of situation A) or B) above.


The pic above is measuring across the 2.2 Kohm resistor arm of the parallel resistors.  Note that the measured amps are identical to the initial, single-resistor-only pic above.

Here is the measurement across the 1 Kohm resistor:


Interesting, no?  It appears that the current across either arm of this setup is identical to the measured amps prior to hooking up the parallel resistor.   I confess I had expected to see a change in the current across each resistor as I added a second one in parallel.  I guess this makes sense, as the voltage drop across each of these resistors is identical.  However, the resistance has changed, so let's measure the total current in the circuit:


The components of the current seen on each arm add to (more or less) the current seen across the entire circuit.  Thus, the more (parallel) resistors you add, the more current you get!

In fact, for certain circuits, this may be an easier way of finding the resistance.  As the current will be the same across each resistor, regardless of how many others will be placed in parallel, it may make sense to calculate the sum of those currents, then use Ohm's law to determine the total resistance of the circuit.  Seems like it could be easier than 1/R = 1/R1 + 1/R2, etc.

So, let's check.  The current is inversely related to the resistance, therefore 1/R = (1/1000) + (1/2200), or 687.5 ohms.  Total current we measured at 2.33 mAmps.  V=IR gives us a calculated voltage of 1.6 volts, which is an accurate reflection of our measured volts.

Good learning!


Friday, June 21, 2013

Hurtin'

Moonlighting, dear readers, is a pleasant diversion from my real job. 

I like the place I work, and of course they pay me like a "real doctor" and not a trainee.  

Occasionally, however, the trainee aspect of my life steps to the front.  With typical disastrous results on my rock-n'-roll lifestyle.  

No progress in the electronics world this week.  

Monday, June 17, 2013

Resistors in parallel, part I

So the next experiment is to place two resistors in parallel.  We start with two resistors of the same strength.

Again, I refer the reader to the HO:ME blog for further discussion of same.  They also refer to some "math" that we will get to in a bit, although probably not at this blog post.

The setup:


This first is just to document the voltage from the single AA battery. 

I then wired the circuit below, and found that as I was wiring the circuit I made a mistake in the way I wired it up.  I had everything connected, below, except for the two dotted lines.  I then had two choices, to connect via path 1 below, or path 2.  I honestly wasn't sure which, so I just did both and measured the resistance:


This is path 1, current of 162 milliAmps:


This is path 2, current of 320 milliAmps:

So right at twice the flow.  Which I thought was wrong.  What happened to the other resistor?  I had two resistors in the circuit, but it seemed that when I ran the path 1 circuit, one of the resistors was effectively cut out.

For comparison, the current just running through a single resistor is 162, same as the path 1 wiring.


So I drew this out with the path 1 section of the circuit tipped over a bit, just to help me visualize, and came up with this funny-looking triangle circuit.   It occurred to me that this triangle loop was a bit deceptive, and what I really have is two resistors in parallel.  One is the actual resistor on the up-and-back part of the triangle, and the other is just a wire.

The resistor itself is 10K ohms.  The wire, 0.4 ohms.  This, in my mind, indicated that there probably is current flowing through the resistor, but it's, oh, 5 or so orders of magnitude lower than that flowing through the wire.  No wonder it looked like I had simply cut that resistor out of the circuit.


This, then, is the diagram for path 2, which is the proper way to hook up the resistors in parallel.


A very simple circuit, which still provided ample opportunity for learning (that is, confusion that required resolution via reading and further experimentation).


Friday, June 14, 2013

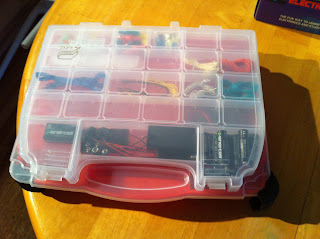
Gear up!

Tired of fussing with all the little wires, LEDs, etc.  Saw that the brother had organized his electrical hobby mess into a tackle box.  Found this instead:


That's how you know you are serious.  Or OCD.  Or just found something on sale, that looked like it would work.  Or didn't have any other blog posts ready and realized this post would be the fastest possible thing to do. 

,m

Thursday, June 13, 2013

Varying voltage and zero sum games

Dear reader, off to another experiment.

First, I suppose I should mention my kid sister, who has a Master's degree in Materials Science from some Hole In The Wall University, and after my conversation with her last night on solar cells, suspect she may have even greater electrical Kung Fu than my little brother.  Not sure who will represent her Kung Fu, ya'll can watch and decide.

I confess to minor deviations from the text of the book.  However, isn't that the point?

We are on experiment 3, which you should take the opportunity to review at the HO:ME blog.  I agree wholeheartedly with the author of that blog that it's difficult to read the bands on the resistors.  And whoever thought that particular color counted as purple?  Crazy.  It was bad enough I purchased a magnifying card to help.

No jokes about old eyes, please.

The experiment has you set up a circuit with a set resistor and an LED in series, initially, then with a potentiometer to vary the resistance.

At one point during the experiment the text asks to check the voltage across both the potentiometer and the LED, and look for variation.

Indeed, it does vary.

Here, at the potentiometer:


Note the intensity of the LED increases as the measured voltage across the potentiometer decreases.

Now the voltage drop across the LED itself:


Harder to see here, but the intensity of the LED increases as the measured voltage decreases.

I admit that at first the changes above confused me, especially when I had only measured the voltage at the potentiometer, and not yet at the LED.  I was caught in a mental trap that equated voltage to "available power".  It was not clear to me why I would have increased intensity at the LED--and therefore an obvious increase in "available power"--when I measured a decrease in voltage at the potentiometer.

It was not until I read in the text that the LED and the potentiometer were "sharing" the voltage that things clicked.  This is a zero sum game.

I first heard that concept when working for P. Read Montague (who is much more impressive than the Wiki article implies) at Baylor's Human Neuroimaging Lab.  It means something a little different than sharing; it implies that there is a set and unchangeable amount of stuff, and that if one party takes more it leaves less for others.  See Wikipedia article.

It became clear later that I had not conceptualized the LED as a resistor either.  In my mind, it was some sort of "passive receptor of electrical power that magically transmutes it into light" as opposed to something with inherent resistance.

In addition, I was not looking at the voltage as a "voltage drop", just as a source of power. In this context it's more appropriate to look at the measured voltage on the multimeter as "voltage stolen by the circuit element being measured"--unless you are measuring a battery or solar cell.

Simple stuff, I know.  I'm sure my younger siblings will get a laugh out if this. But good learning, nonetheless!

,m


Tuesday, June 11, 2013

Experiment 2

Again, dear reader, I refer you to the HO:ME blog for the details of experiment 2.  In short (pun not intended) the point of this experiment is to short out a battery.  Feel the heat, baby!

So I shorted out the 1.5 v AA battery.  Nothing to see, really, so I'll post a random picture here to distract you:


Nice, eh?

The next phase was to short out a fuse.  I bought the collection of automotive fuses from RadioShack, as that was the only one that had a 3 amp fuse.  Unfortunately, 1.62 volts/.8 = 2.02 amps, which I would not predict would blow the 3 amp fuse.  So I just turned right to the 9v, presuming that my calculated 12 amps should take care of business.

Hooked it up.  Watched.  Waited.  No fire, no energy, no nothing.  What?

Checked the battery.  Produced less than 7 volts.  Double what?

This was the same battery I had used for the earlier tests, and at one point I had run the battery through a very small resistor and then through the multimeter, showing 2 amps current.  Left it like that for a while.  Didn't think much of it.  Until I picked that stupid battery up and found it was--what else? hot as blazes.  I got lucky, I did.  Hot batteries have been known to cause some problems.

Dreamliner grounded due to battery fire

Turns out that the above lead to some reading on the difference between battery capacity, current, amp-hours (or watt-hours) and why folks use a stack of 1.5 v batteries to power their remote controlled cars instead of a single 9v.

Voltage for a battery is set by the number of cells, etc internal to the battery.  Capacity is how much energy it can store--like the size of the gas tank in the car.  A battery can then produce a certain number of amp-hours, which is number of amps for a certain amount of time.  A 9v rated at 2 amp-hours can produce 2 amps for 1 hour, 0.5 amps for 4 hours, etc.  This is analogous to the range in your car.

However, just like in the car, speed makes a difference.  The faster the car goes, the more inefficient it is (air resistance increases as a square of the velocity).  Same for batteries.  Running batteries at high current depletes it faster than the rated amp-hours would suggest.

A typical 9v is rated at 0.55 amp-hours, or Ah.  A 1.5 volt AA has 2.4 Ah, almost 4x as much.  So a stack of 6 AAs in series that add up to 9v will last much longer, at the cost of increased weight.

My 9v would only be expected to run 2 amps for about 15 minutes.  But that's a high current for a 9V, so probably even less.  Its ability to put out the number of amps required to burn out the fuse was clearly compromised.

So experiment 2 was a bust (or not, depending on how you view the fuse).  But good learning.


Monday, June 10, 2013

Follow up to lesson 1 of MAKE: Electronics

So, dear reader, a few follow-ups.

I measured the resistance of the tongue after water, then after a mild salt solution, seen below:


and found no difference in resistance.  I was unwilling to go "more salty" in the name of science.  Today.

My little brother commented that you have to measure current in series, and voltage in parallel.  So the question I had earlier about why the current dropped when I added another element in parallel reflects my igg-ner-unse of how things work.

Ah well.  His electrical kung fu looks like this:


Mine, like this:


'Nuff said.

The setup below was reprised, and instead of pushing the key I just measured across the leads, putting the multimeter in series as it should be:


complete with the 9V battery.  The measured resistance of the tongue today was about 320 kohms.
So the resistance du jour was around 835 kohms, and with the battery consistently putting out about 9.7 volts, that predicts around 11 microAmps.

Measured amps across the tongue was in the range of 14 microAmps.  Given the literature I read, I was expecting a threshold around 1 microAmp, perhaps lower.  Need More Resistance!

Turns out that to get down to 1 microAmp (an order of magnitude drop from 10 microAmps) I need an order of magnitude more resistance.  9.7 Mohms, to be precise.  I don't have enough resistors to do that, even if I wire them all in series I barely cross 1 Mohm.  So we downgraded the battery to AA and 1.56 volts.


So Mr. Ohm predicts 1.8 microAmps with this approach, and indeed we were in the ballpark.  Turns out my threshold is somewhere just shy of 2 microAmps.  Turns out in my previous experiment that when I was pushing the switch that "connected" the circuit, I wasn't actually changing the current, despite a change in the multimeter reading.  More on that later.

So Experiment 1, subexperiment 1 is done.  Threshold: around 1.8 microAmps.

Saturday, June 8, 2013

Fun with Electronics

Dear reader, I occasionally run off on a fad.  (I insert here that the wife would take issue with "occasionally".)

Not a clothing/fashion fad, mind you, as I have little sense for such things, despite much effort & patience on the part of my sainted wife.  No, the fads I am referring to involve intellectual ADHD.  And typically come at a time when things are not going well with woodworking.

Fortunately, it doesn't take much to take off on a tangent.  I have the starting materials to veer off into gardening (successfully), woodworking, electronics (see below), lockpicking, robot building (Myra's favorite; no I did not build that), jewelry making, tile work, and outdoor construction.  So when I need to take a break from woodworking, it means very little capital outlay.  Which is good, as we have very little capital inlay.

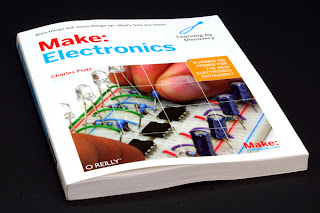
For Christmas, I received this book:  MAKE: Electronics by Charles Platt.  It's a beginner book, with a fair amount of destructive testing, meaning you learn about stuff by playing with it until you have broken it.  I'm a fan.


There is an excellent blog found here that already goes through each experiment in the book, step by step, precisely by the instructions.  I am starting there, and veering off (remember my ADHD?) to other experiments that suggest themselves.  In addition, as I am too much of a cheapskate to actually buy most of the components, I have a 130-in-1 electronics kit that I am using in lieu of dropping around $100 in components.


The first experiment documented here at the Hands On: Make: Electronics Blog (hereafter HO:ME blog, and yes that's an In Living Color reference) involves licking a battery.  Yes, you read that correctly.


(No tongues were harmed in the creation of this image)

A 9V battery, just to give that extra zing.  For those who have tried it, it is relatively easy to feel the current pass through the tongue.  Having prior experience in the realms of neuroscience, my question was:  just how sensitive is the (moist) tongue to current?

This may seem like a silly question.  In fact, it probably is.  However, there is an entire field of study called "electrogustometry" which you may or may not want to Google.  Per Google Scholar, in excess of 1000 papers have been published in peer-reviewed scientific journals on this topic.  So someone out there cares.

Here is the setup:


In the bottom left corner is the 9V battery.  This is wired through the 470 kohm resistor, then in series with a potentiometer (meaning, a variable resistor) that varies from 1.3 ohms up to 45 kohms.  It then runs through a switch (that light blue thing in the lower right corner) and then there are the two yellow wires you can see above, that run to the tongue.

Resistance of the tongue was about 140 kohms the day of the experiment.  There is quite a bit of variability in this measurement, as previously I have recorded as high as 650 kohms, using the same meter, in the same location on the tongue.  Perhaps I had something salty to eat this morning.


This means that the total resistance through the entire circuit that day was 650 kohms, and plugging that into Ohm's law gives V/R=I, or 9.72/650,000 = 1.4 x 10^-5 amps, or 14 microAmps.  Not much, but (just barely) within the detection limit of my meter.  Even if I can feel this clearly, increasing the resistance (lowering the current) doesn't make much sense as it goes below the detection threshold of  my meter.


Nonetheless, I hooked everything up, set the potentiometer to max resistance, and put the wires on the tongue.  I could just barely feel the faintest tickle of current, most apparent when I was tapping them on the tongue.  I did notice an odd phenomena, however, which bears mention.

Not knowing the proper way to measure current with a multimeter, I put the probes in the two springs surrounding the switch above.  This does allow for measurement of current but bypasses the switch and closes the circuit.  When I did so, I had a current of about 17-18 microAmps. When I pressed the switch, the current dropped to 0.1 microAmps.  I was able to detect both, but obviously the stronger current produced the stronger sensation.  I had calculated previously that the resistance through my multimeter is about 4 ohms; across the switch it's about 0.4 ohms.  It's unclear to me why the current dropped when I added another resistor (the multimeter) in parallel.  Perhaps my EE brother can weigh in on the situation.

Reviewing the literature (see comment about electrogustometry above) is an exercise in frustration.
Every relevant paper is hidden behind a firewall, and if you wish, you can pay $31.50 per article to view:


This is, in my opinion, ridiculous.  Your little article is not worth $30.  In fact, it's probably barely worth the paper it's printed on.  Paying for articles also has the effect of dampening scientific research in less-developed countries, as they cannot afford to pay the money to keep up to date with the literature.  Nor can individual investigators (hobbyists) keep up if everything costs so much.  I don't wear tinfoil hats, but this seems like a great way to ensure that the vast majority of research is carefully funneled into official channels, where The Powers That Be can have oversight.  I hate the stupid publishers that think this is a good idea, and applaud journals like PLOS that make everything open source from the start.

::descends from soapbox::

Either way, from the crumbs I was able to glean, they referred to 5 microAmps as a "very high stimulus".  I could feel 0.1 microAmps, an order of magnitude less.  So I am in the ballpark.  They also indicated that the size of the probe itself affects sensation--the larger the probe, the easier to feel the electricity.

Overall a successful experiment.